I just had it repainted too and I was getting ready to place the chassis back into the cabinet when I realized that NOW, since the radio looks so nice, I couldn't possibly put that mangled old ratty-looking cardboard dial face back in there too!
So even though I knew it would mean spending the entire night with Photoshop redoing this dial face pixel by pixel.. I "bit-the-bullet" and did it!
I started off with a 600 dpi original scan and worked on it in that resolution. This way when I'm done my edits and errors won't be detectable when printed out at 300dpi.
The one on the left is the ratty original ( as if you couldn't tell) and the center one is the first one I did... however I didn't like the poor contrast of the white numerals against the gray background.. so then...I made another copy.
The last one I also darkened the background to a dark-red-oxblood...and changed the numerals to oxblood too.
It's a real pain doing these things.. but the final results can be rewarding.
I printed it out on Lumijet brand Genuine Pearl-finish 10-mil photo-quality ink-jet paper at 300dpi and it looks quite good.
Especially since I'm printing on a really cheap JUNKY- old Epson Stylus 760 printer too... ( found it USED on Ebay for $40)
I only bought it because my original 760 bit the dust 2 years ago...and I still had a bunch of cartridges for it..
Anyway.. this JUNKY-used thing works like a charm.
I didn't expect it to be so darn good either.. so I also bought a brand-NEW Epson R220 Photo printer at the same time.
The new one still sits in the un-opened box (now 2 years)... until this old-one stops printing or I run out of ink...lol
Anyway.. I'll get this NEWLY printed dial into the radio tomorrow and let you guys see the final results then.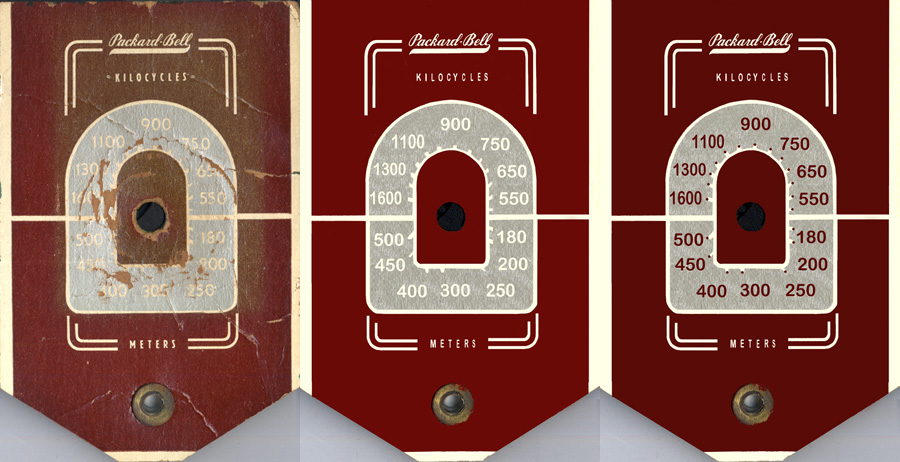
The darker numbers look better, but I wonder if the dial and dial light are added the reason for the original design may be mase apparent.
Best Regards,
bill Grimm
With all due respect, You are doing it wrong (pixel by pixel). A dial like this, including saving the original font should take at most 20 minutes for someone with a little experience in Photoshop. I had a preference for Paint Shop Pro (when I was under Windows, now with Linux Ubuntu) as it was much simpler to work with.
Always start in greyscale and work with layers. This way you can save the original font doing cut and paste and mirror images with the rest of the dial. Add color as the final layer.
You still did a very nice job though.
Syl
:
:With all due respect, You are doing it wrong (pixel by pixel). A dial like this, including saving the original font should take at most 20 minutes for someone with a little experience in Photoshop. I had a preference for Paint Shop Pro (when I was under Windows, now with Linux Ubuntu) as it was much simpler to work with.
:
:Always start in greyscale and work with layers. This way you can save the original font doing cut and paste and mirror images with the rest of the dial. Add color as the final layer.
:
:You still did a very nice job though.
:
:Syl
Syl :
Yeah Adobe Illustrator or something using vectors would have been a lot easier.. I used to work with "arts and letters" years ago but don't have a current copy.
I'm not up to speed on Illustrator and always seem to just fall back to what I do know and/or have on hand when I do these things... and I never seem to take the time to get more familiar w/ the better tools when I'm not under the gun.
I did use substitute fonts.. but needed to preserve the logo.
So I worked around it bit by bit like this...
The other graphic white curved lines were hard to do in Pshop too w/out vectors.
I thought it was for the model 100.. but maybe the 100a or B?... I also see a model called Kompack.
Mine came with no dial cover and I was about to make one.. but maybe THIS model really doesn't have one?
My case has art-deco like sweeping curved lines surrounding the speaker grille on the top and bottom.
Do any of you guy know for sure which model belongs to this dial?