So I threatened to do it soon.
Well "soon" became tonight.
After I got home from dinner around 10 PM I got in the mood to attack it.
I can't believe I made such fast progress in such little time.
(I did everything in only about 3 -4 hours.)
1.) I re-glued and clamped down all the lose veneer and other parts.
2.) I stripped the old finish off ( using 50/50 lacquer thinner & acetone)
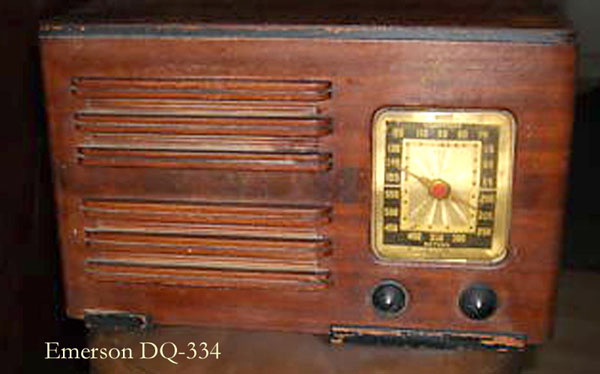
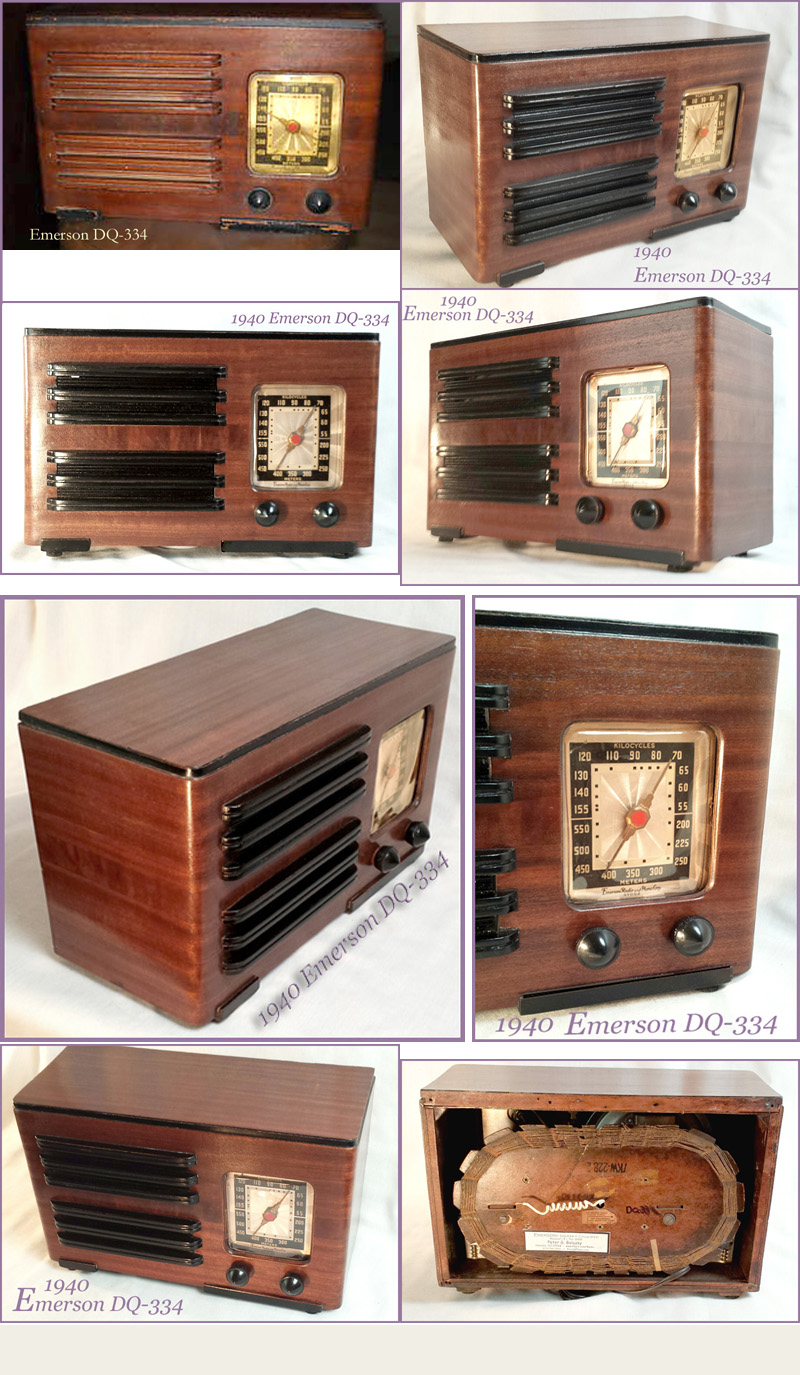
3.) I stained the body of the cabinet using Minwax "English Chestnut"
4.) I masked off other areas and spray painted black lacquer on all the trim and grille.
5.) Top coated the entire cabinet with Minwax Wipe-on-Poly (satin)
6.) Using a sheet of polycarbonate plastic I heated and formed a new clear dial cover using a previously made Masonite template I made for a similar model.
Right now everything is drying.
Tomorrow I'll shoot some pictures and post the completed project.
It's amazing how much one can get done in only a few hours!
Usually I just do a light waxing over the top coat.
But I didn't want a very high-gloss "piano-type finish" on this radio.
I really liked the rich walnut grain so I wanted it to look like hand-rubbed walnut... and that's pretty much what I did.
I first rubbed out the 2 coats of Wipe-on-Poly top-finish when dry, with 0000 steel wool. Then I applied Boston paste wax with a steel wool pad to really work it in. Then I buffed it out.
Again I re-applied more paste wax in a heavier coat with a moist rag. When dry I buffed it out by hand several times, sprinkling a mist of water on it as buffed it out.
Then gave it a final hand rubbing buff.
All total about 2 hours.... just buffing and waxing.
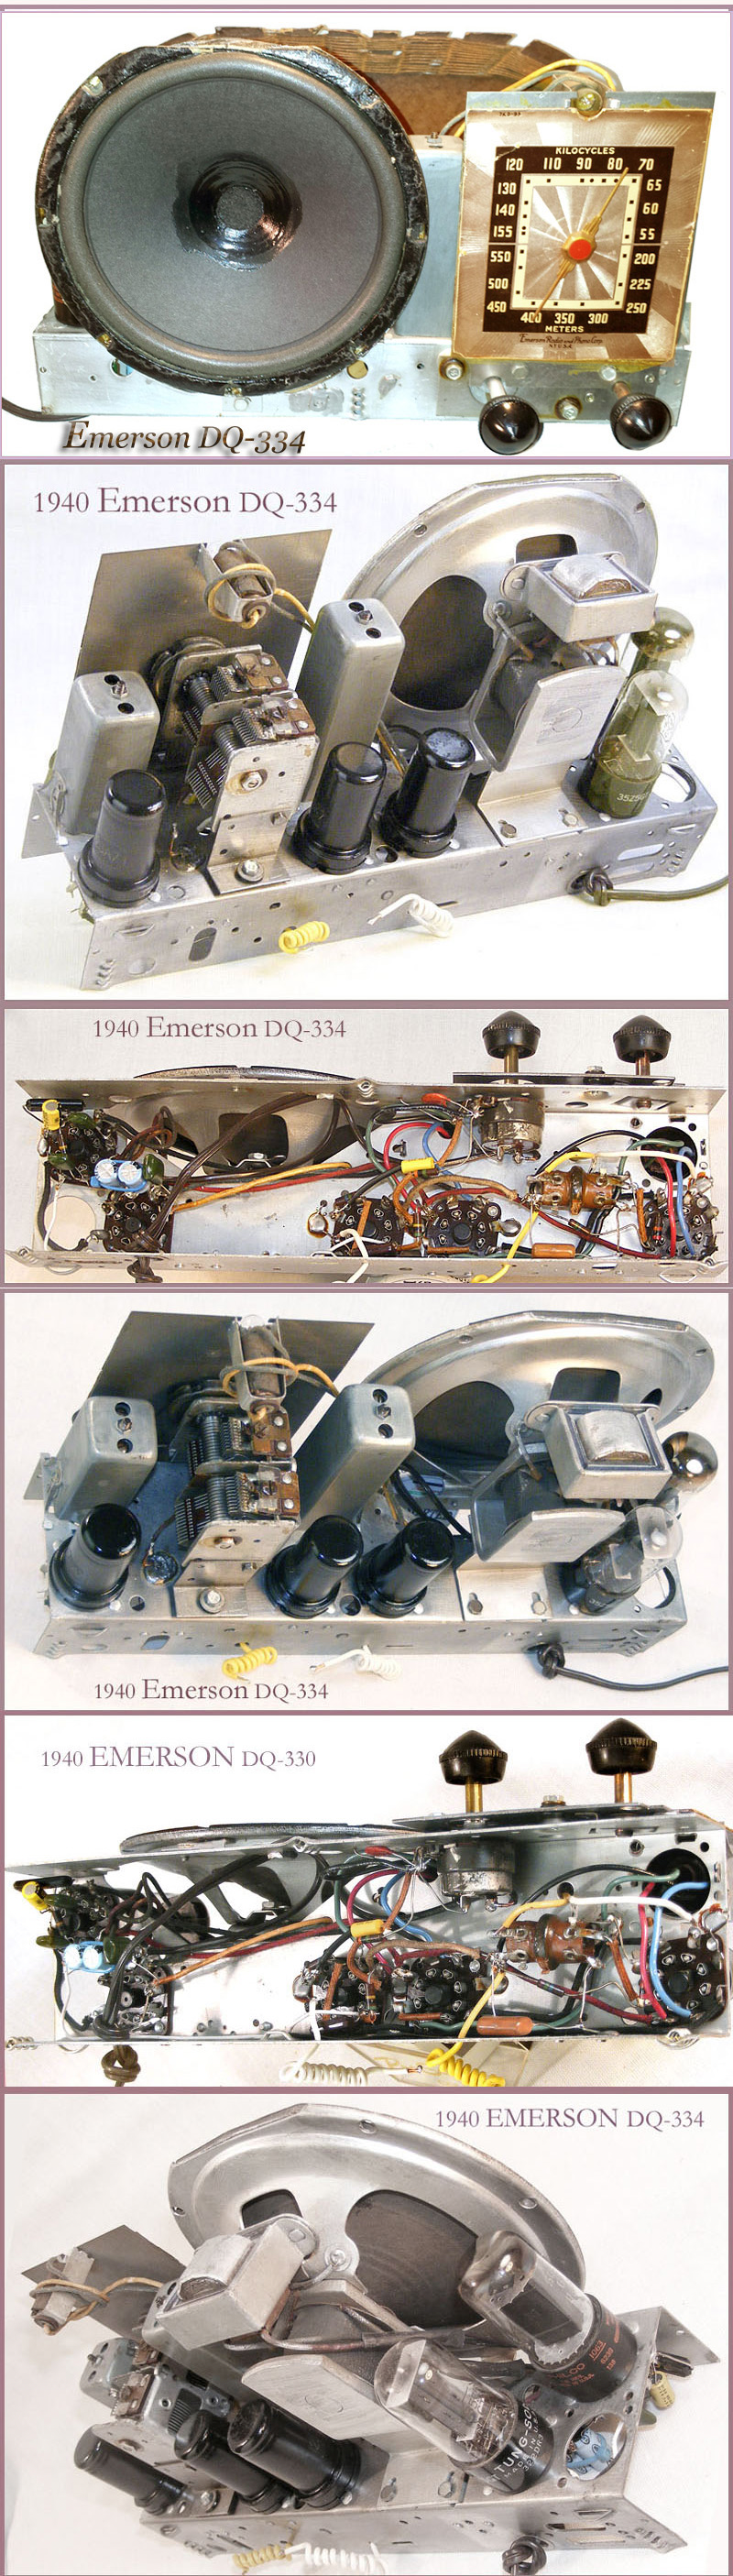
Below the cabinet you see the chassis.
Notice I re-coned it with one of those nice cones that I bought at www.electronix.com
http://www.electronix.com/advanced_search_result.php?keywords=cones&search_in_description=1&osCsid=9jf2795iaip9649a1kd01517i3&x=0&y=0
These cones are great and low cost too ! ...
I simply cut away the old cone leaving a small section of the old cone in the center to which I glued the new cone. The new cone gets glued to the basket rim as well.
Be careful not to have any pressure on the voice coil.
Here's the whole thing:
Can't do that.
It's the egress for the frenulator waves.
True audiophiles operating the radio from the front panel would detect it instantly.
:
:Can't do that.
: It's the egress for the frenulator waves.
:
:True audiophiles operating the radio from the front panel would detect it instantly.
:
:
Hi Peter, another great looking radio. As for the hole I know that if you plug it, it will throw the Feng Shui of the audio out of wack unless you use the original part. Very keen of you to hear the difference in sound quality. It also would make a very sad radio and pron to evil spirit possession and we certainly don't want that going on. Right? LOL All kidding aside GREAT JOB, wish you lived out hear I could sure use some help. I won't get caught up till sometime in October and that is if I don't get anymore dredded floor models to restore. Take Care Buddy, George T
.... and thanks for sending me the CD too.
I just watched that video of the Atwater Kent you restored for the TV show.
Great work George!
Me either.... of course. No one can.
As I said at the bottom of my original post after those first 4 hours of gluing, stripping, staining and top-coating
..."everything is now drying" ... "photos to follow tomorrow"
It depends on the top-coat.
If I use lacquer I'll usually always wait until the next day to apply it after the stain is thoroughly dry.
But if I'm using Minwax Wipe-on-Poly which contains mineral spirits, I will often apply it not long after the stain, ...like maybe an hour or two afterwards.
My thinking is; ....since the Minwax penetrating stain can be also be thinned with mineral spirits .... the top-coat of Wipe-on-Poly, containing mineral spirits, is compatible.
I'm certainly not advocating that folks should apply a top-coat so soon. No.
Yes, I did it successfully, ... but that was just because I was curious as to how it might work.
A top-coat is normally not applied until at least 8 hours later allowing for the stain to thoroughly dry. This is as recommended on the Minwax penetrating-stain can instructions.
My serendipitous success in applying Wipe-on-Poly so quickly as I did, was an experiment that seemed do-able.
It all stems from my unconventional spirit, my basically experimental nature, some general impatience and my crazy sleeping hours.
I'm usually up all night and sleep most of the day... lol
Dumb.. I know. But I'm retired... so who cares? Right?
Anyway I'm too impatient to wait a whole day before top-coating so I like to get as much done before I finally hop into bed.
That way, if I can apply that top-coat, it can dry while I sleep.
The success of this experiment led me to another one last night.
Yep.. at 11pm lat night, I started stripping a Zenith 6D029 "Boomerang" radio cabinet.
By 5 am I had allowed the stain to dry a bit... and tested it to see how dry the surface really was. It seemed almost there .. so I used a paper towel to go over the whole surface lightly to see what would come off. Not much if any. So I decided to be bold again and apply the fist layer of Wipe-on-Poly top-coat.
I went to bed around 6am and when I got up today at 2pm, I checked the surface, and it was ready for a 2nd coat which I applied.
Just now as I write this at 6pm I checked it again and saw that a 3rd coat could be applied so I did it.
The timing is such that when I come back from dinner tonight at about 9PM, everything should be ready for the next step.
I may apply a 4th coat or ...if this looks good enough, I may just "take it down" (remove gloss)... a little with a 0000 steel wool pad lightly...and then apply some paste wax.
So in summary, ...for the most part, my experiments have worked. Once in a while I find I was a bit cavalier and have to go back and fix something.
But when it all comes together nicely, I can feel a sense of accomplishment and that maybe I've discovered a new trick or two along the way.
... nothing ventured.. etc?
...Right?
But any black paint I have around I'll use.
Prep area first to remove dirt and wipe down with mineral spirits.
Good luck.
Let's see it when you're done.